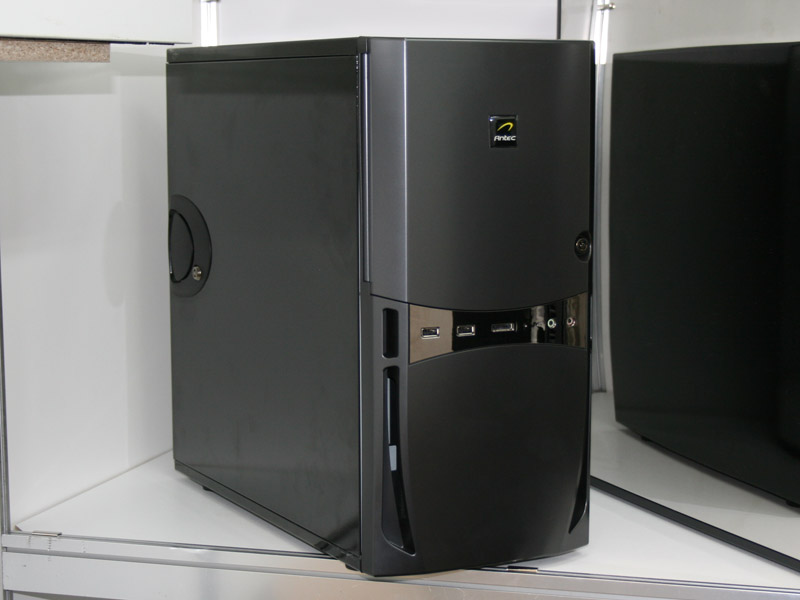
Maybe I like it because it’s in my price range (unlike that 108″ LCD they keep showing off), but the new Antec Sonata III (pic) case looks like a stealth fighter compared to my aging Sonata I. I’ve grown tired of my current case, but it is quiet. This may get me to upgrade. Or I’ll go with the Antec Nine Hundred.
AMD Athlon 64 X2 6000+ 3.0GHz Socket AM2 Processor
Swap Hard Drives with Ubuntu 6.10
I recently upgrade my main workstation’s hard drive under Ubuntu 6.10 and noticed a couple things changed during the process. Here are my instructions for a fast and reliably hard drive swap. I’m using SATA drives without LVM using the default Ubuntu install and partition options for this howto.
- Prepare
- Shutdown your machine and install your new hard drive. Don’t mess with your current hard drive (yet)
- Find a LiveCD, I used the Ubuntu 6.10 LiveCD, it matched my OS, but it doesn’t have to. Knoppix should work fine.
- Boot using your LiveCD
- After booting, open a terminal and “sudo su” to become root
- Setup your new drive
- Use cfdisk /dev/sda to look at your partitions on your current drive. I have sda1 of type linux as most of my current drive, and a 6 GB sda5 as linux swap at the end
- Duplicate this on your new drive using cfdisk /dev/sdb, adjusting for space as necessary. I created a new primary partition using cfdisk using all but 6 GB of space, then a new logical partition using the rest of the space. You must create the partitions in this order to get the right numbering
- make the primary partition to bootable
- set the swap partition as type 82 (linux swap)
- save and quit
- create filesystems on the new partitions using mkfs.ext3 /dev/sdb1 and mkswap /dev/sdb5
- Copy data
- Make directories to mount your old and new partitions, in this case, /mnt/sda1 and /mnt/sdb1
- Mount your drives to these partitions using mount /dev/sda1 /mnt/sda1 and mount /dev/sdb1 /mnt/sdb1
- Copy all your data from your old drive to your new drive using cp -a /mnt/sda1/* /mnt/sdb1/ . The -a will preserve owners, permissions, date, etc.
- Get up and do something else. It took 70 minutes for my machine to copy about 150 GB of data from one drive to the other
- Fix the boot options
- This is where Ubuntu 6.10 differs from previous versions. Fstab and menu.lst both use UUID numbers to find partitions. To get the UUID number of your new partitions, run vol_id /dev/sdb1 and vol_id /dev/sdb5 . Copy these numbers into their appropriate places in your /mnt/sdb1/etc/fstab and /mnt/sdb1/boot/grub/menu.lst files. You may need to dig around the menu.lst to find all the entries.
- Now install grub onto the MBR of the new drive to make it bootable. To do this I first chroot into my new system using chroot /mnt/sdb1 /bin/bash . Now that you’re in the new system, run grub. Inside grub, run setup (hd1,0) then root (hd1) . This will differ if you have a different drive setup. Quit grub (quit).
- Finish up
- Logout of your chroot (logout), unmount your mounted drives umount /dev/sda1 and umount /dev/sdb1, and shutdown your computer. Disconnect your old drive, plug your new drive into the old drive’s cable, and start your computer back up. If everything went well, it will boot back up as if nothing happened.
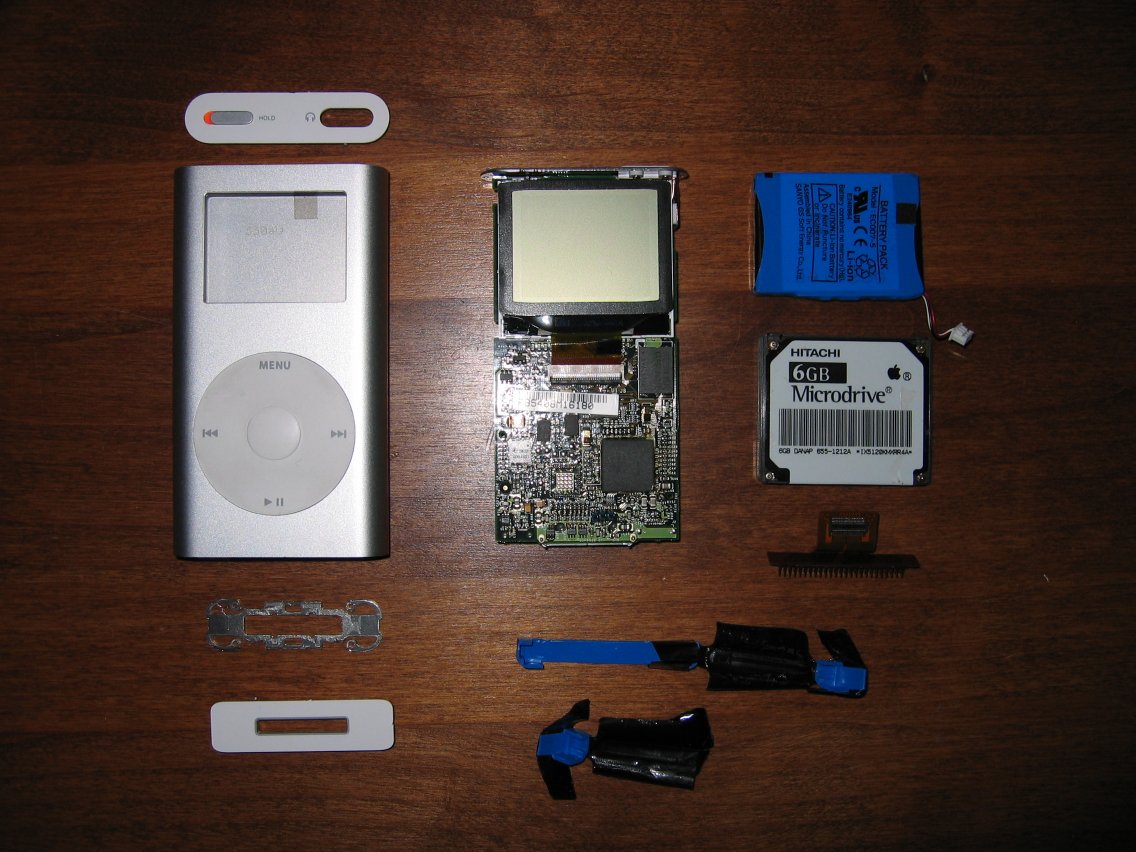
iPod Mini Disassembly
My poor iPod Mini’s hard drive died a couple days ago, which left me without a means to play MP3s while walking around. Since I haven’t yet purchased a headphone adapter for my phone, I started googling and discovered I would be able to replace the dead hard drive with a standard compactflash card. I couldn’t wait for the card to arrive before taking it apart.
Update:
My 4 GB compactflash card arrived, I installed it in my iPod mini, crossed my fingers that I plugged it in correctly (top of the cf card faces away from the circuit board), and reassembled the thing. That was it, I plugged it into my computer and it after running the “restore” from iTunes it works! I now have a flash memory iPod mini :D
A Couple Ways to Run FSCK on Ubuntu
My server decided that an executable file didn’t really exist on the file system, or so I thought. Lack of sleep was the main problem, but here are some things I did to check my file system for errors. I setup this file system on a Ubuntu 6.06 AMD64 install with LVM, so everything is in LVM instead of standard partitions.
# sudo e2fsck -n /dev/mapper/Ubuntu-root
This was showing errors, but I ran it while the system was mounted and running, so there were open files, so this was normal. The -n kept e2fsck from attempting to fix anything, which was good because later I ran the command after booting from an Ubuntu LiveCD and found no errors.
Before booting from the LiveCD I tried to get the system to fix itself by running fsck on boot. Two methods I used to do this on Ubuntu were running these from the live system before rebooting, they both accomplish the same thing, so only one was really needed.
# sudo touch /forcefsck
# sudo tune2fs -C 40 /dev/mapper/Ubuntu-root
These appeared to have no affect, probably because the filesystem was fine, but I took down the system and ran fsck from a LiveCD instead. Of course, this wasn’t as simple as it should have been, the LiveCD did not detect my LVM volumes, so /dev/mapper/Ubuntu-root was missing. The fix was to install LVM2 and start it up.
# sudo apt-get install lvm2
# sudo /etc/init.d/lvm start
The /dev/mapper/ entries then appeared and I could run all the fscks I wanted. At this point my fsck checks were coming out clean, so file system corruption was not to blame.
Bug #59269 in lighttpd (Ubuntu): “lighttpd fails to restart during logrotate script”
I had my first Ubuntu bug report confirmed and fixed by the Ubuntu team. The bug I encountered kept Lighty from coming back up when being restarted. Since the default logrotate scripts had Lighty restarting every night, this bug hit my Rails apps quite often. Extending the logrotate script’s rotate frequency helped, and I was about to install Monnit, but now it looks like I can skip that knowing the restart bug has been fixed. Hooray for well managed open source projects.
makezine.com: Dual Booting Linux and Windows XP
I just discovered that one of my websites made the printed version of Make Magazine. In issue 6, on page 124, there is a link to frozentech.com/content/livecd.php. This marks the first time I’ve been in print!
Other big firsts include being on the radio, mentioned by Leo Laporte (!) (first hour, at 20:30), being included in a presentation at LinuxWorld, and being on Slashdot, Digg, IBM Developerworks, and SecurityFocus.
Windows Explorer List-style File Browsing in Linux
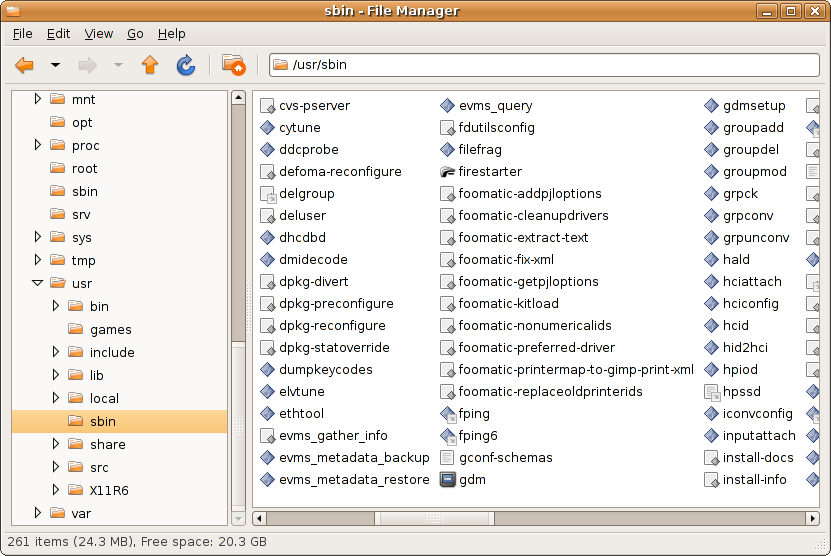
I believe my quest for the perfect GUI file manager in Linux has been fulfilled after I stumbled across a file manager named Thunar while playing with XFCE on my Ubuntu laptop. My most missed feature from browsing Windows file systems has been the “List” view. It’s is, very simply, columns of file names, with nothing else. The main file browsers of Gnome and KDE, Nautlius and Konqueror, suprisingly cannot do this, and while they come close with a lot of customization, they do not mimic Windows Explorer perfectly. Nautilus like to wrap really long file name, or only do one file per line, and Konqueror likes to add “…” to the end of long filenames, which makes it less than useful.
Thunar does both these things, and does this very quickly. Here’s a pic of what I’m so excited about (right click and hit “view image” to see the full sized pic):
Ruby on Rails on Ubuntu Edgy
I updated my laptop to Ubuntu 6.10 Beta (Edgy Eft) and it’s working great. So far I’ve had less problems than the beta of Dapper, but it has only been two day. My first experience off the tested path of synaptic packages is ruby on rails. Edgy comes with a rails package, but like Dapper, no gems. So here is the install of gems, and the rails from withing gems, on Ubuntu 6.10 Edgy Eft.
# sudo apt-get install ruby ruby1.8-dev irb rdoc
# wget http://rubyforge.org/frs/download.php/11289/rubygems-0.9.0.tgz
# tar xvfz rubygems-0.9.0.tgz
# cd rubygems-0.9.0
# sudo ruby setup.rb
# sudo gem install rails
I did get an rdoc error, but everything else installed fine, so I ignored it and continued on. This error is fixed by adding rdoc to the apt-get command above. It is here for historical purposes, and perhaps will help someone.
/usr/local/lib/site_ruby/1.8/rubygems/custom_require.rb:27:in `gem_original_require’: no such file to load — rdoc/rdoc (LoadError)
Other Notes:
- you’ll need to ‘apt-get install build-essential’ before you can ‘gem install mongrel’
- better documentation can be found at http://wiki.rubyonrails.org/rails/pages/RailsOnUbuntu
Roll your own servers with Netcat
Lifehacker has a primer on Netcat, one useful utility which I don’t use nearly enough. Most stuff shown can be done with SSH, nmap, and telnet, but the author makes the point that netcat is on everything. So if you’re ever stuck without SSH, Netcat will be there. And if you haven’t setup passwordless logins for SSH yet, it’ll be quicker for many tasks than having to transfer keys around beforehand.